
Last weekend I installed my Wilderness Rack from Garvin Industries. I ordered this rack about a month ago but just got around to installing it. I was actually planning to wait on this install until after the lift install but I needed the space in the garage.
The rack was delivered in three large, and heavy boxes.

It took me about an hour to unpack all the parts and then another hour to read through the installation instructions. Then I needed to inventory all the parts and organize. In all it was about 2 hours of work before I could even start the install.

Let me say that the instructions for this product are top notch. The key to this install is to take your time and read the instructions carefully. You will be drilling holes in your Jeep and this is the last thing you want to screw-up. The only deviation I made from the instructions had to do with the install of the rear supports. The instructions call for removing both taillights at once. I preferred to do one side at a time.
The picture below shows the passenger side taillight assembly removed. The is needed so that you can gain access to the backside of the rear fender. There is lots of stuff that will be installed on the inside. The only thing to know about this step is that you only need to remove the inner two screws to remove the taillight assembly. The outer screws do not connect to the body and do not need to be removed.

Now we are getting into the stressful part - drilling holes in the body. I don't know about you but I spent lots of money on this thing and the idea of drilling holes in it freaks me out. You only get once chance to do this right so take your time. The first thing I did was put some blue painter's tape over the area where the holes will go. This protects the area as well as giving you a place to draw the guide lines for the holes. The instructions include good diagrams for how to locate the holes. Remember, measure twice, drill once...I measured three times.

Once the measuring is done it is time to drill. You will start with a 1/8" pilot hole and then drill out the 3/8" hole. You will only do the rear two holes at this time (see below) and then you will use the bracket as the guide for the third hole.

You can see in the picture below why you use the bracket to locate the third hole. It seems almost like it is in a random location. At this point you might be tempted to start installing the top bracket. I know I was high on the excitement of drilling holes that wanted to get to the next step. Don't do it. You will just be wasting a lot of time. You need to drill the holes for the bottom bracket because you must install both the top and the bottom at the same time. There is a connector bracket that goes inside the fender as some other parts that ties the top and bottom together. There are about 22 parts that need to be installed at the same time and if you forget one you get to take it all apart. I think it took me three tries to get all the parts in the correct order installed. A little more time reading would have prevented most of my troubles.

Once you have installed all the bits you should have something like the picture below. I tried to get pictures of the internal stuff but they did not come out. Follow the diagrams in the instructions and you will be OK.

Once the brackets are installed you can put the taillight back on. This part of the process took me about 4 hours but it really should not have taken more than 1 to 1.5 hours. The drilling part stressed me out and then not reading the instructions carefully for the bracket install cost a lot of time.

Here is the up-right installed on the passenger side. No dings or scratches...a job well done.

Now it is time to move on to the driver's side. This side poses the additional issue of the fuel filler and the license plate bracket.

Both the taillight assembly and the factory license plate bracket must be removed. The factory license plate bracket will be replaced by a new bracket that mounts onto the vertical support for the rack. We will talk about that later. Once you have these parts removed you will have lots more stuff to work around inside the fender. This should not be an issue but it does get in the way.

Drilling the holes is the same as the other side but reversed. The fuel filler makes this seem harder but it not. In fact, the bracket install on this side took only an hour as I now knew what I was doing.

Here we see the driver's side support installed. The supports are so complicated because they are actually huge hinges. The entire rack can be lowered by swinging it to the back of the Jeep. This allows for the installation or removal of the top without having to remove the rack completely. It is a nice feature but you might need as extra hand when it comes time to install these supports. There are several washers and bushing that are installed at the same time and this tricky while holding a heavy metal bar.

In this picture you can see the top of the rear support. For the hardtop install there is a big rubber bumper that you install on the support to prevent contact with the hardtop.

Because the rack is hinged you need clearance for it to move. The factory license bracket would be in the way of this so the kit includes a new bracket that mounts to the rack support. The hardest part about this is wiring the new light, or so I thought. There is a cover plate for the big hole in the body where the license plate wiring goes. Take your time here and plan out how you want to connect the wiring. I used the pigtail from the factory bracket to connect the new light. The problem was that the plug did not fit through the hole in the cover plate and I did not find this out until after I crimped the wires. I had to cut the cover plate to allow the wire to get through. Again, it I had taken a bit more time and thought it through I could have avoided this.

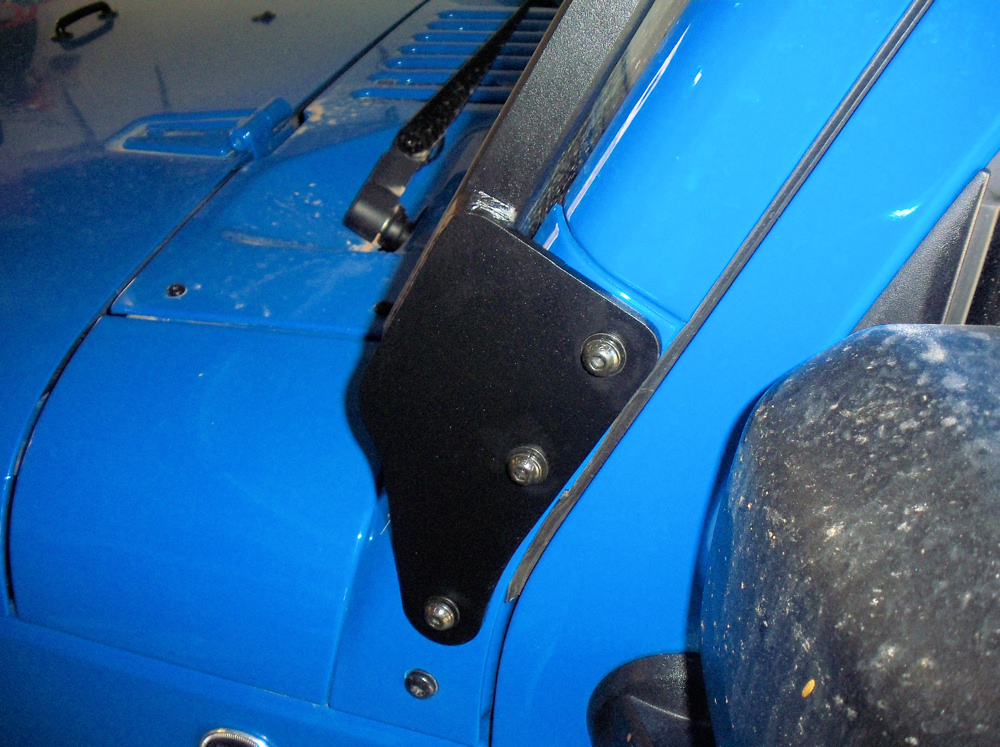
Once the rear brackets and supports are installed it is time to move to the front. The front supports mount to the windshield mounting points and are very easy to install. New bolts are included. This is an area where another set of hands is very helpful. You do not want to drop this heavy bar through your windshield.


After 9 hours in my 108f garage I had finished installing all of the mounting brackets and supports for the rack but I was spent. The next morning I got up early and built the basket. This process took about 2 hours. Make sure you use thread locker on all the bolts for this step. Another thing to watch for is the torque on the bolts holding down the ribs. It does not take much to snug these down and the instructions make it clear that over-torque will damage the rib and are not covered under the warranty.

It will definitely require two people to get the basket on the top of the Jeep. There are only six bolts to attach the basket to the supports and for these I did not use any thread locker.


This rack is very study and rugged and should last as long as the Jeep. The install was harder than I expected but well within the capabilities of a novice mechanic. It does not seem to add any significant noise to driving and it is mostly invisible from inside the Jeep. I think it looks fantastic!
 Swapping them out alone in the drive way turned out to be a bigger pain than I expected. My plan was to keep the stock tires and run them most of the time and then switch them out before a trip. That is still the plan but it is getting more likely the new tires will just stay on.
 Between the new rack and the new tires the jeep is a lot more noisy. As you can imagine the noise is worse with the tops off. It sounds like a billion angry bees.
 The Jeep drives great with the new tires and I think it looks amazing. I can't keep Kathy away from it.




 The scenery was amazing. In the picture below you can see Bixler mountain and the we were looking for the trail head to the left of the mountain.


